I have done a fair amount of research and component selection for my proposed purchase of an RV next year so far this is what I have come up with I’m sure it will change over time.
Proposed Setup
Below is my proposed setup but in order to verify if this will meet my needs before installing any solar equipment I will probably install a battery monitor with shunt kit and do some real world testing before installing any solar equipment so I only have to do this once.
At this time I have selected SF100 Solar Panel with Accessories from AmSolar, 3 or 4 of these will be required to give me the estimated power to replenish my batteries.
AmSolar now offer a Complete System that takes all the guess-work out of choosing components. This is the kit I am looking at purchasing if only they would ship to Canada. It turns out they do ship to Canada but you have to contact them directly, due to the high shipping cost.
If you have limited roof space and/or a chassis that is near its weight limit, then this is a good choice for efficiency and light weight. With this panel, you will be able to put some serious wattage on RVs with a Sprinter chassis.
The Rocker Foot Mounts that are included in this kit allow fitting them to curved roofs an easy task. The feet come with several different mounting points so you can get the solar panel level on sloped roofs. These mounts also allow the use of our optional Tilt Bar Sets which give you increased output during the winter months and are handy when it comes time to clean the roof under the solar panels and best of all you don’t need to drill holes in the roof since the supplied feet us 3M VHB Tape to stick them to your fiberglass roof. Still undecided if I am going to go that route or simple drill into the roof. It is recommended before installing the screws and brackets, to put a gob of Dicor over each drilled screw hole. After all the brackets are secured to the roof, cover them with additional Dicor.
I need to select a roof location where the panels will not be shaded by any vents, air conditioners, TV antenna, etc. Because most solar panels are made of individual cells wired in series, if just one cell get shaded it can shut down the entire panel. It’s just like those old Christmas lights, where if one bulb burned out, the whole string stopped working.
For the wiring entry into the “body”, I will utilize the opening around the roof top refrigerator vent. I probably will use AMSOLAR’s Vent Combiner Box and then run 6AWG wire, down the vent most likely in a conduit and onto the floor behind the cabinets to my Solar Controller. Along this run will be a Circuit breaker to “disconnect” the panels should maintenance be required.
The solar controller I have chosen is the Blue Sky Energy’s Solar Boost 3000i. It is a 12Volt, 30Amp, 400Watt MPPT Solar Charge Controller. MPPT Charge controllers are said to offer 30% better efficiency than PWM controllers. I will mount this either in the entry way panel where the battery control switch is or underneath and behind a drawer in the cabinetry. I have chosen also, to use Blue Sky Energy’s IPN Remote which includes a Battery Monitor as well as being able to access the MPPT controller or multiple controllers remotely. I am going to mount the Remote to the Entry Way Panel or next to the “Convenience Center Panel” depending on ease of installation. Using this remote, I can easily add additional panels and controllers as our needs may change without butchering up the cabinetry or appearance too bad.
The Inverter I am considering it a Go Power 2000 Watt Pure Sine Wave Inverter it looks like it should meet all my needs but I still need to do some research.
I am also considering replacing the battery converter on the RV I purchase with a smart one it depends on what the unit I purchase comes with but a 4 stage smart converter seems to be the most recommended unit to ensure long battery life.
I might swap out the RV batteries at a later time, 2 6 volt AGM batteries 400 Ah seems to be the recommend upgrade but will run 6AWG cable from the controller to my LifeLine GPL-27t AGM Deep Cycle RV Batteries with the appropriate fuses.
I will run 6AWG wiring from the controller to my RV Batteries with the appropriate fuses as well as a A/C Line Voltage Meter to check we are receiving the proper voltage when we have A/C hookups.
Or I might just purchase a complete kit from Go Power time will tell, I really need to purchase an RV so I can get started on this all this research is giving me a headache.
Tools Required
Hammer Crimper or Hydraulic Crimper
Very Nice 4 Part Solar System Install
https://www.youtube.com/watch?v=P8fQIlleazA&nohtml5=False
Installation
Installation isn’t too difficult if you are willing to scramble around on the roof a bit:
(1) Install the solar panel on the roof.
While working with the panel, keep it covered so it isn’t producing electricity. One easy way to cover it is to cut part of its cardboard packaging to size and tape it on.
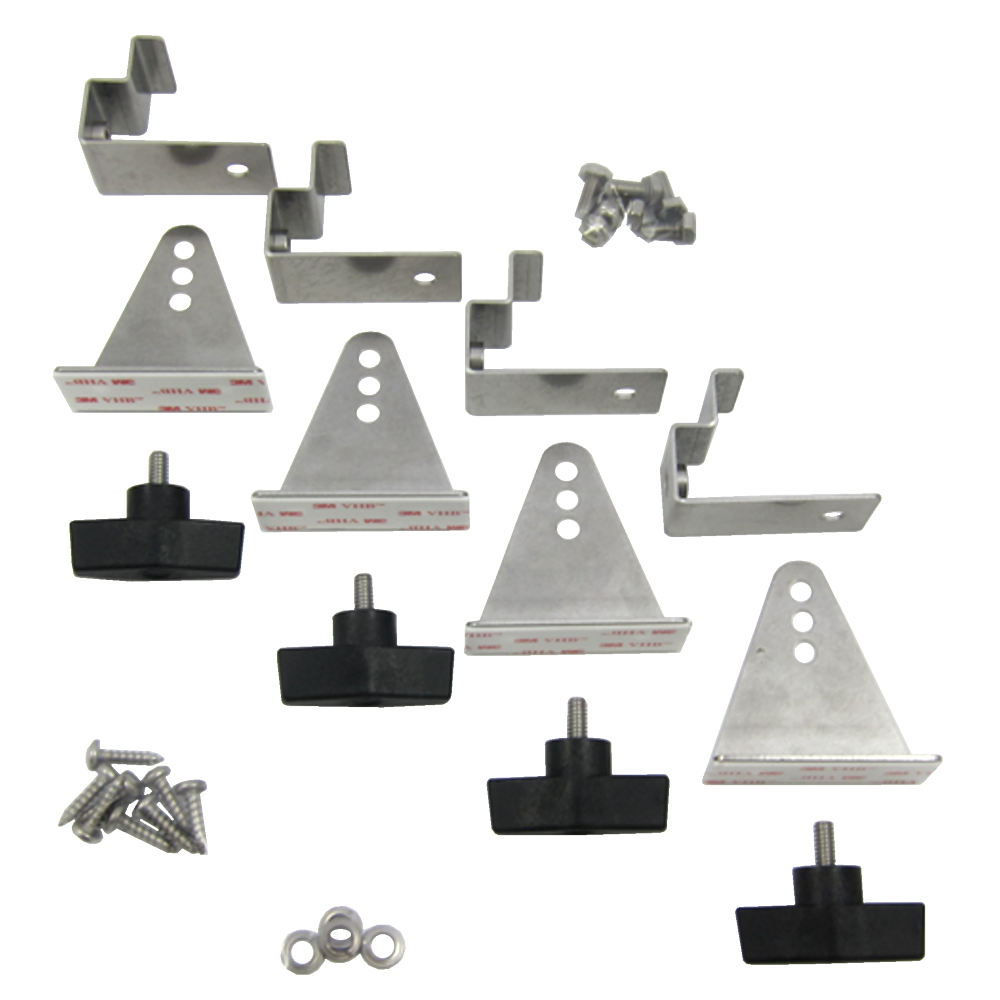
Solar Panel Mounts
It’s possible to use 3M VHB tape to adhere the panels to your roof as long as it’s smooth and properly cleaned this way you don’t have to drill holes in the roof.
Since the VHB tape will be compromised on the corrugated fiberglass roof – this is the process. VHB application as normal – clean clean clean with a scrub brush and alchohol – set in place.
Drill 1/8 starter hole in through the mount holes. Fill with Dicor, coat screw with Dicor, screw in. Cover entire foot with generous helpings of Dicor over the entire foot – viola.
Here are some installation video’s from AMSolar:
If there is a chance you might eventually want to use your RV in winter, install the panel on tilting brackets so you can tilt the panel towards the sun. It isn’t necessary to tilt the panel in the summertime, but it can be a huge help in the winter when the sun rides very low in the sky and doesn’t shine down on the panel but actually shines kind of across it from just above the horizon. Tilting the panel towards the sun might give you an extra 25% of total charge for the day in the wintertime.
When you have tilting brackets, you have to climb up on the roof to tilt the panel each time you set up camp — and you have to remember to climb back up again to lower it down before you drive off. If you don’t think you want to do all that scrambling around on the roof, skip the brackets (and consider getting two panels instead, described in Part III of this tutorial).
(2) Install the charge controller inside a hatch near the battery compartment.
(3) Run the wires from the panel to the charge controller
Connect one end of the wire to the panel (there are screws in the junction box on the panel that you screw the wire to). Run the wire down through the refrigerator vent to the battery compartment. Taping the wire to a metal snake and snaking it down behind the fridge really helps. We snaked ours down inside a piece of PVC pipe that we used as a kind of conduit to keep the wire away from the back of the fridge. If you do that, make sure the PVC pipe is quite a bit bigger than the thickness of the wire so you can get it through easily.
At the charge controller, connect the wire coming down from the solar panel to the input side. Run a second wire from the output side of the charge controller to the batteries. It is best to crimp eyes on the ends of the cables.
(4) Remove the cardboard from the panel.
You should also see an LED light on the charge controller turn green to indicate that it is charging.
Now your panel will start charging your batteries all day every day. It might even start charging them before you get out of bed in the morning! They will charge faster if you are in full sun. Just a little shade on the panel (like a single tree branch across one corner) will cause them to charge much more slowly.
(5) Use your AC appliances
Plug your portable inverters into whatever available cigarette lighter outlets there are inside the RV.
Whenever you want to watch TV, DVD’s or use your laptop or charge your camera batteries or toothbrush or whatever, plug the appliance into an inverter, turn the inverter on, and use the appliance as you would at home!!
RV solar panel installation on a travel trailer – completed
A successful morning’s work – the panel is permanently installed!
(6) Add a second 12-volt battery to your battery box (this could also be Step 1, it doesn’t matter).
The battery is your energy storehouse. You add energy to it when you charge the batteries and you remove energy from it when you use your appliances and lights. Think of your batteries as being a big kitchen sink. You fill the sink with water (charge the batteries) by turning on the faucet. You drain the sink (when you use your appliances and lights) by removing the drain plug. The goal is to keep the sink at least 2/3 full all the time. After a day of sunshine, as the sun is setting, your sink should be full. After an evening of watching TV and computer work, your sink should not be less than 2/3 full (batteries don’t like to be drained until they are empty).
So you have to balance the size of your faucet (the total wattage of the solar panels), the size of your sink (the total amp-hour capacity of your batteries) and your appliance usage (how often and for how long you remove the drain plug) to make sure you don’t drain out more than you can fill up on a sunny day.
Most RVs come with a single Group 24 12-volt battery. These typically store about 70 amp-hours of energy. Adding a second Group 24 12-volt battery will double the size of your “sink” to about 140 amp-hours of energy. As a very general rule of thumb, the total watts of your solar panels should be comparable to the total amp-hour capacity of your batteries. With 140 watts of solar panels in this system, it makes sense to have two 12-volt batteries to give you 140 amp-hours of battery capacity.
Make sure there is room in the battery compartment for a second battery, as some RVs don’t have room for one. When shopping for an RV, if you plan to dry camp a lot, make sure the battery box can hold two 12-volt batteries. Wire the two batteries together in parallel.
And that’s it for this whole system. Very very simple. The only limitation to this system is that you need to keep your TV/laptop usage fairly light and you cannot use your microwave, toaster, hair dryer, vacuum or air conditioning unit. However, it is a great starter setup to get your feet wet and learn to live in a solar driven home on the road.
Monitoring Your Batteries
The easiest way to see how your batteries are faring is to use a multimeter and measure the voltage. This is not scientifically accurate, as batteries have personalities and memories and only tell the truth about themselves when they have not been under load for a long time and have been cleaned of their surface charge. But those fancy things are reserved for more complicated systems. Checking your batteries’ health with a multimeter is an easy way to go.
Early in the morning, before the sun has gotten over the horizon, measure the voltage between the battery terminals. If it is 12.3 or higher, you’re okay. If it is lower than that, go outside and play and leave the indoor appliances alone for a day or two (and hope for sunshine). If that’s not possible, start thinking about finding a place to plug-in.
Likewise, check out the voltage sometime right after sunset before you get the TV or laptop going. If it is 12.6 or more, you are golden. If not, then rethink your evening’s activities a bit.
Links
GoPower a BC based company go Canada!!!